
This guide is intended for IT staff who will be setting up the client computer for the Settrax Kiosk.
Please follow the instructions in order. Note that several setup videos can be viewed through the Settrax Support site that is available to you by clicking the Help icon once you’ve logged into the Settrax site.
It’s important that the computer is set up prior to the Go-Live/Launch date ensuring there are no delays of kiosk use for your facility. Setting up the computer can be done prior to the kiosk frame arriving.
Links to all Kiosk Downloads Needed
1. To set up a kiosk client computer, you will need a few items before you get started:
- Admin privileges to the client computer
- Client Computer with Windows (Windows 10 or higher)
- Monitor that has VESA mounts on the rear to allow mounting to the kiosk.
- Zebra GX430T Label Printer with included power cord, USB cable and take-up spool (picture included).
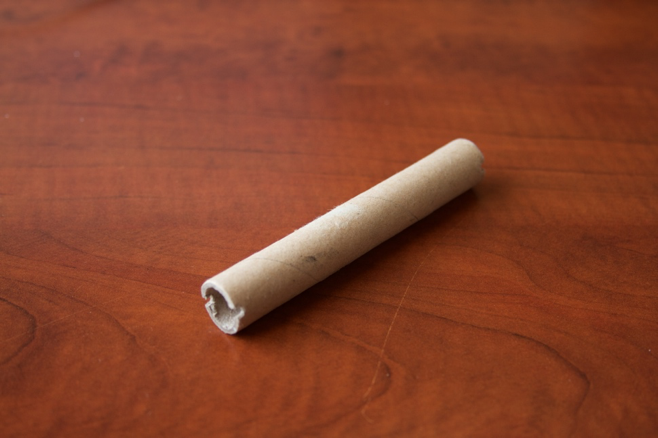
- A roll of Z-Ultimate 3000Z labels and a Zebra 5100 Ink Ribbon roll. There is a cardboard “take-up” roll inside of the label printer box that is also needed.
- Scale Data Cables (1 set per kiosk)
- Kiosk Weight Scale - Adam AE CW Plus 15 or Adam AE CW Plus 35
- Logitech C615 Webcam Utility
- Settrax administrator login credentials. Contact support by emailing support@settrax.com and providing the hospital you work for, your hospital provided email and your full name to have credentials created for you. You will need this to complete the setup of the kiosk.
2. Zebra GX430T Label Printer Setup
Make sure the printer’s power switch is set to “OFF” before plugging in the power cord and USB cables. Doing so while the label printer’s power switch is in the “On” position can damage the printer.
- Install the roll of labels and the ink ribbon into the label printer while it is off. To watch a video how to do this please follow this link https://www.youtube.com/watch?v=2rysyws-J9Q
- The ink ribbon will need to be spooled onto the take-up roll as seen below.
3. Plug the power and USB cables into the computer and then into the label printer and power on the label printer.
3. Setup Zebra Utility
- From this link, https://www.zebra.com/us/en/support-downloads/printers/desktop/gx430t.html download and install the Zebra Setup Utility for windows software which will include the drivers necessary for the label printer.
- Once the Zebra Setup Utility software has been installed, open the application
- From the application home screen click “Configure Print Quality”
- Select “Manually Select Speed and Darkness” then click next.
- Select Speed, 2.0 and Darkness, 30 and click Print Sample Label.
- If the label looks good, click next and save the settings to file.
- Click FINISH to complete the process.
- Now, from the printer home screen click “Open Printer Tools.”
- Select the “Action Tab” and then click “Calibrate Media” and click the “Send” button at the bottom of the screen. The printer will now calibrate the label media to ensure proper tracking. You will notice several labels feed in and out of the label printer.
4. Logitech C615 Webcam Utility
NOTE: If connecting webcam to windows 11+, no download is required. Simply plug in camera and skip this section.
- The Logitech C615 Webcam can be downloaded at this link http://support.logitech.comhttps://support.logi.com/hc/en-us/articles/360024846573--Downloads-HD-Webcam-C615/product/hd-webcam-c525.
- When the software is complete click “Check out my webcam”
- Click webcam controller to open the advanced camera settings.
- Uncheck the auto-focus box and move the slider all the way to the left to set the focal point correctly.
5. Settrax Process Application
Settrax requires a helper app to be installed at any kiosk location so that label printing and automatic weight capture can run. This requires your Settrax administrator login credentials to complete.
- Open your web browser and go to, https://app.settrax.com/login.
- Login to your Settrax admin account and click Settings > Kiosk Management.
- Click the link titled “Settrax Kiosk App (v.1.x.x) to download the app installer.
- Once downloaded run the application as an admin. After opening the download, you may have to click More Info, then click Run Anyway.
- Once the app is downloaded, sign out of Settrax and close out of the browser. Open the Settrax app using the Icon that was created on the desktop from the download. Log into Settrax and click Settings > Kiosk Management.
- Click on “Define This Computer as a Kiosk”.
6. Adam AE CW Plus 15 and Adam AE CW Plus 35 Kiosk Scale Setup
- Go to https://zadig.akeo.ie/ and download "Zadig 2.8". If this site is blocked or you are unable to download, please contact our support team to assist you.
- Open the Zadig 2.8 file in your Downloads. A window will open. Select "Yes" to "Make Changes".
- Under the options dropdown, select "List all devices". Select USB Serial Controller D.
- Select "Replace Driver" or "Install Driver". The driver should then install. Once installation is complete you can move on to the next step.
- Connect the power to the scale.
- Press the unit button on the scale display until “lb” is displayed in the top right corner of the display. Once “lb” shows in the top right corner turn the scale off by pressing the On/Off button.
- With the scale OFF, connect the scale data cables to the serial port on the scale and then plug the USB adaptor into the computer.
- Depress the Zero button and while holding it down press the On/Off button. You should see “ProOff”
- Press the “Unit” to cycle through the settings. Below is what the settings should be set to.
ProFF
bL 2
oFF kg
on lb
oFF oz
oFF lb/oz
Add 1 *
b9600 *
PAr 1 *
trn 2 *
Hod 1
HEi 1
10. Press the Print/Hold to save the settings
7. Start Up Folder Setup
- Add the Settrax Kiosk App to the startup folder.
- Restart computer.
8. Test Kiosk Setup
- Log into Settrax again using the desktop icon created from the download.
- Once you are logged into the Settrax system, navigate to Settings > Kiosk Management
- Click “Test Printing Labels” and three labels should print, if they do not print, please retrace your setup steps ensuring each item was followed correctly.
- Place a weight on the scale and click the “Test Desktop App” button. The weight displayed in the app should match the weight displayed on the weight scale display. Occasionally you will need to click the “Test Desktop App” button a few times before the weight matches up.
If you have further questions on this article or to learn more, please contact support at support@settrax.com. We're here to support your success!
Comments
0 comments
Please sign in to leave a comment.